My first time of writing Windows service program, it actually not as tough as I thought it will be in the first place.
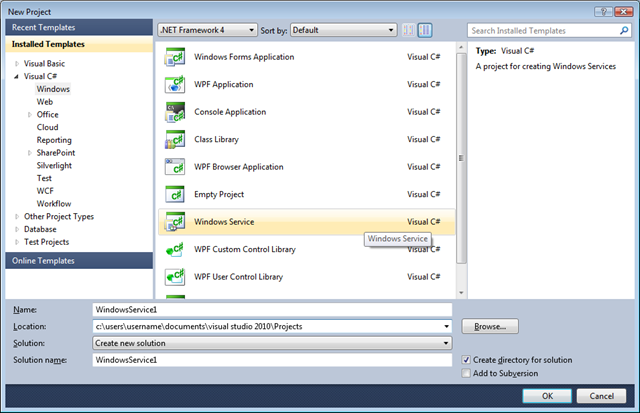
To start off, is to create a new Windows service project, of course, this had me confused for the first time, after selecting the language, C# or VB, instead of choosing the template, actually the Windows Service template is inside the –> Windows category.
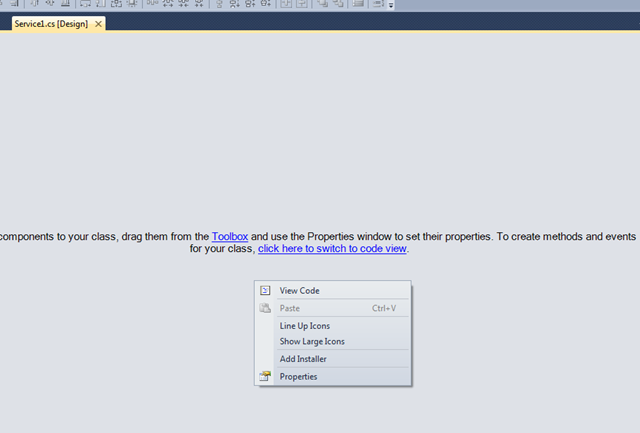
This is what we’ll get after created the project,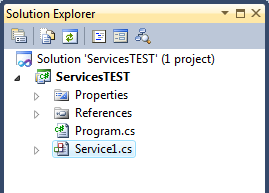
To start coding it, simply right click and select view code, and we’ll presented with the familiar code screen. It actually more or less like coding a console project, so in my situation here, I wanted to do some schedule task that kick off once service start, based on preset interval.
The using statements, which I only add in the Timer namespace, as the rest already created when the project is created.
using System;
using System.Collections.Generic;
using System.ComponentModel;
using System.Data;
using System.Diagnostics;
using System.Linq;
using System.ServiceProcess;
using System.Text;
using System.Timers;
The only code I’ll be using here, OnStart is where the code will hit when the service is start running, and the args is just like how we pass in parameter in console project.
protected override void OnStart(string[] args) {
  Timer t = new Timer();
  t.Interval = Convert.ToDouble(args[0]);
  t.Elapsed += new ElapsedEventHandler(timer_tick);
  t.Enabled = true
  t.Start();
}

protected override void OnStop() { }

private void timer_tick(object sender, ElapsedEventArgs e) {
  System.IO.StreamWriter sw = new System.IO.StreamWriter("C:\\Test.txt");
  sw.WriteLine(DateTime.Now.ToString());
  sw.Flush();
  sw.Close();
}
The above code is to create a timer object when the service start, and take the parameter as the interval, and do all the stuff.
Since we cannot run the project by pressing F5, we need to create installer for it and run it. This is quite easy to do. To do this, double click on the Service1.cs (or whatever the name is), and at the design view, right click and choose Add Installer.
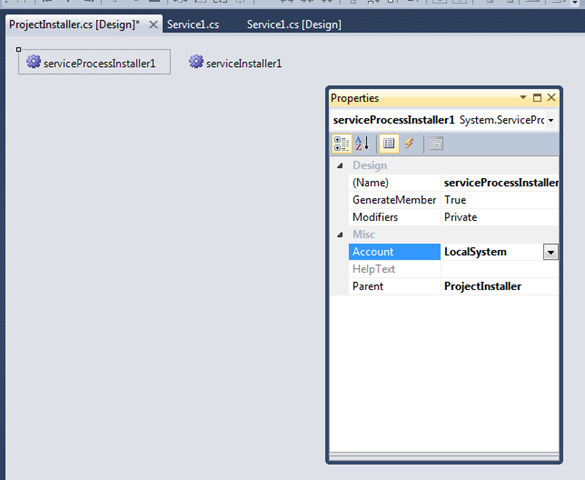
A file called ProjectInstaller.cs will be created. On the design view of the new file, there will be 2 item there, serviceProecessInstaller1 and serviceInstaller1
Select the serviceProcessInstaller1 and on the properties, set the Account to LocalSystem, can try with different properties, but I found this setting works for me. And also I found it works better when build the solution with Release setting, without the prompting of user login.
After build the solution, using Visual Studio Command Prompt, navigate to the exe and run installutil , it should install the service, else check the log in the folder with notepad for details. There are some other setting on the serviceProcessInstaller1 that will trigger login dialog when installing the service, just key in and password to login, if local machine, then use .
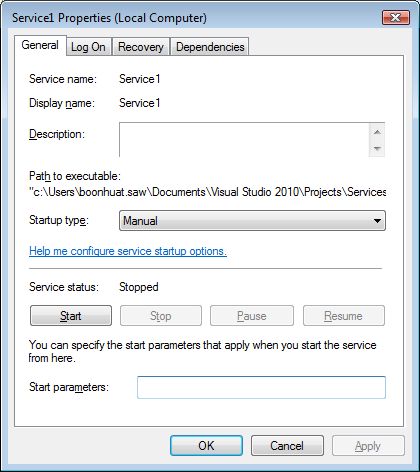
To pass the parameter to the service, go run type services.msc , on the services windows locate installed service and from there, key in value in “Start parameters” like how we pass in to console application.
