Continued from Creating Mobile Apps with Sencha Touch 2 – Part 2
Now that we have most of the things ready, just need to modify something to let the store sync (CRUD operation) back to server.
Uncomment the proxy in the Note store, and remove the dummy data.
app/store/Note.js
Ext.define("SenchaNote.store.Note", {
  extend: "Ext.data.Store",
  requires: ["SenchaNote.model.Note"],
  config: {
    model: "SenchaNote.model.Note", //need full name
    proxy: {
      type: "ajax",
      api: {
        create: "http://192.168.168.10:8888/SenchaNote/Note.php?action=create",
        read: "http://192.168.168.10:8888/SenchaNote/Note.php",
        update: "http://192.168.168.10:8888/SenchaNote/Note.php?action=update",
        destroy: "http://192.168.168.10:8888/SenchaNote/Note.php?action=delete"
      },
      reader: {
        type: "json",
        rootProperty: "notes",
        totalProperty: "total"
      }
    },
    autoLoad: true
  }
});
Now that the note store is ready to interact to the defined URL in the api.
Create a database named senchanote, with 2 tables, notes and categories.
notes table
| id | int |
|---|---|
| content | varchar(100) |
| categoryid | int |
categories table
| id | int |
|---|---|
| name | varchar(100) |
for the sake of testing, I’m not using stored procedure here. Here the categories table will be the one populated in the selection field, and the selected id will be link to the notes table. Simple.
Now the PHP code for handling all the CRUD operation.
Note.php
<?php

$current_page = 1;
$offset_page = 0;
$limit_per_page = 25;

$link = mysql_connect("localhost","root","root");
mysql_select_db("senchanote",$link);

if (!isset($_REQUEST["action"])) {
  $result = array("notes" => array(), "total" => 0);
  $current_page = $_REQUEST["page"];
  $limit_per_page = $_REQUEST["limit"];
  $offset_page = $_REQUEST["start"];
  $query = "select n.id,content,categoryid,name from notes n left join categories c on n.categoryid = c.id limit " .$limit_per_page. " offset " .$offset_page;
  $dbresult = mysql_query($query);

  while($row = mysql_fetch_array($dbresult)) {
    array_push($result["notes"],
      array(
        "id" => $row["id"],
        "content" => addslashes((string)$row["name"]),
        "categoryid" => $row["categoryid"],
        "category" => (string)$row["name"]
      )
    );
  }

  $query = "select * from notes";
  $dbresult = mysql_query($query);
  $result["total"] = mysql_affected_rows();

  mysql_close();
} else if ($_REQUEST["action"] == "create") {
  $inputPayload = file_get_contents("php://input");
  $inputPayload = json_decode($inputPayload);
  $query = "insert into notes values(NULL,'" .htmlspecialchars($inputPayload->content). "',".$inputPayload->categoryid. ")";

  $dbresult = mysql_query($query);

  if (mysql_affected_rows() > 0) {
    $result = array("success" => true, "message" => "Note added");
  } else {
    $result = array("success" => false, "message" => mysql_error());
  }

  mysql_close();
} else if ($_REQUEST["action"] == "update") {
  $inputPayload = file_get_contents("php://input");
  $inputPayload = json_decode($inputPayload);
  $query = "update notes set content='" .htmlspecialchars($inputPayload->content). "', ".
"categoryid=" .$inputPayload->categoryid. " where id=" .$inputPayload->id;

  $dbresult = mysql_query($query);

  if (mysql_affected_rows() > 0) {
    $result = array("success" => true, "message" => "Updated");
  } else {
    $result = array("success" => false, "message" => mysql_error());
  }

  mysql_close();
}

if (isset($_REQUEST["callback"])) {
  header("Content-Type: text/javascript");
  echo $_REQUEST["callback"]. "(" .json_encode($result). ");";
} else {
  header("Content-Type: application/x-json");
  echo json_encode($result);
}

?>
Is a very straight forward PHP code (and probably the terrible one). Basically it check for parameters action, which we set at the api, and based on that, we go retrieve from database. I also check for page, limit and start parameters, which will pass in automatically by Sench Touch paging plugin, so we can just use it in our MySQL query for paging.
Our select query will need to push into array, so that we can encode it as json. So we’ll need
$result = array("notes" => array(), "total" => 0);
here we create a root named “notes”, which will contains the records we retrieved, and a “total”, for the count of available records. Note that the “notes” and “total” is named the same as the one we defined in the note store reader section.
reader: {
  type: "json",
  rootProperty: "notes",
  totalProperty: "total"
}
The total property is basically use for the paging plugin to decide when it should show no more data available text.
We then can use the array_push in PHP to push each records into the “notes”, after iterated all the results, we assign the total to the “total”, resulting the json string.
{
  "notes": [
    {
      "id": 1,
      "content": "blog 1",
      "categoryid": 1,
      "category": "Nonsense"
    },
    {
      "id": 2,
      "content": "blog 2",
      "categoryid": 2,
      "category": "Food"
    }
  ],
  "total": 2
}
Also note at the bottom most of our PHP code, there is a IF ELSE statement, it check for callback query string, which is automatically attached if we set the proxy to scripttag instead of ajax. This is used when we need some cross domain access, which Ajax not allowing, it will wrap the callback in the callback function and execute on the client side, it is OK to leave the callback wrapping out if it’s from same domain. I personally felt is easier to handle cross domain thing at the server script, perhaps using CURL.
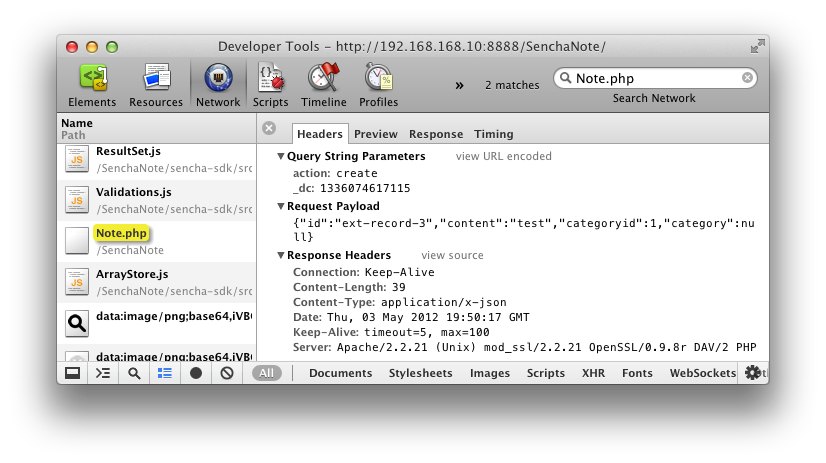
For the create and update it’s a bit new to me, when Sencha Touch sync the store to the server via the api, it didn’t pass the record value using querystring, instead, it uses the payload in headers, if we observe it using browser developer tools, we can see how it passes the json value:
So now we can use the following PHP code to read from it, and parse the json.
$inputPayload = file_get_contents("php://input");
$inputPayload = json_decode($inputPayload); //got the json string, and decode it into json object
One thing I still not able to figure out was after calling noteStore.sync() in the note controller, I couldn’t figure out how to pass in callback function and read from the result server spit back, in order to display success or fail message, read it somewhere it going to be added in.
Now remove the dummy data in category store, and prepare the categorylist.php.
categorylist.php
<?php

$link = mysql_connect("localhost","root","root");

mysql_select_db("senchanote",$link);

$result = array("categories" => array());
$query = "select * from categories";
$dbresult = mysql_query($query);

if (mysql_affected_rows() > 0) {
  while ($row = mysql_fetch_array($dbresult)) {
    array_push($result["categories"], array("id" => $row["id"],
      "name" => addslashes((string)$row["name"])
    ));
  }
}

mysql_close();

if (isset($_REQUEST["callback"])) {
  header("Content-Type: text/javascript");
  echo $_REQUEST["callback"]. "(" .json_encode($result). ");";
} else {
  header("Content-Type: application/x-json");
  echo json_encode($result);
}
?>
So very simple, just pull out everything from categories table. Now that I’m lazy to write category maintenance screen, so I’ll just insert some data in MySQL directly. After that our apps now can do the CRUD (well, delete will just be the same as the create and update)
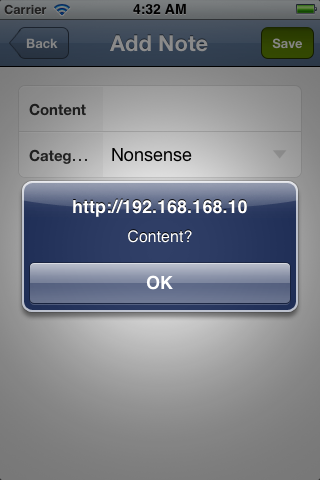
Wait, I did add in validation in the note model, but where is the validation message? Well, amend the note model to add in error message:
app/model/Note.js
{
  type: "presence",
  field: "content",
  message: "Content?"
}
And then back to note controller save button:
app/controller/Note.js – onSaveButton:function()
var errors = currentNote.validate();
if (!errors.isValid()) {
  currentNote.reject();
  Ext.Msg.alert("Invalid", errors.getByField("content")[0].getMessage(), Ext.emptyFn);
  return;
}
After reject the update, we use the nice little alert message box built in to Sencha Touch (we can just use alert and the phone will display a native looks box), and use the getByfield(“content”) to get the validation data for the content field, and since a field can have multiple validation, here I knew I only have 1, so access using the index 0, and the getMessage is the function to get error message.
Now the after we updated an existing record, let say we change the category from, let’s say “Nonsense” to “Food”, and content from “Blog 1” to “This is not a blog” and we save it, then when we go back to the list, we can see the content is updated to “This is not a blog”, but the category still displaying the “Nonsense”. Because when we sync it (update in this case), Sencha Touch post to the defined URL, and then it update the local record with the one we update to the server, but remember we did not do anything on the text in the category selection field, we just simply binding the id of category store and categoryid from note store, and Sencha Touch will do the rest to match up the options. So when we updated the record, we need to update the local store with the updated category text (the id is done for use by using the categoryid).
We’ll need to add in code to search the Category store, search in the id field, using the selected categoryid, and then get the value of the field “name” (the id field and name field is defined in our Category model), and then set it back to the local record.
app/controller/Note.js – onSaveButton: function()
currentNote.set("content", newValue.content);
currentNote.set("categoryid", newValue.categoryid);
currentNote.set("category", Ext.getStore("Category").findRecord("id", newValue.categoryid).get("name"));
Just add the one line code under the previous codes.
Paging, mobile device is lack of memory to hold lots of data, even desktop browser or application, we shouldn’t load everything at one request, we page it. Sencha Touch 2 came with paging plugin. We need to do a little adjustment on existing codes.
app/store/Note.js
Ext.define("SenchaNote.store.Note", {
  extend: "Ext.data.Store",
  requires: ["SenchaNote.model.Note"],
  config: {
    model: "SenchaNote.model.Note", //need full name
    proxy: {
      type: "ajax",
      api: {
        create: "http://192.168.168.10:8888/SenchaNote/Note.php?action=create",
        read: "http://192.168.168.10:8888/SenchaNote/Note.php",
        update: "http://192.168.168.10:8888/SenchaNote/Note.php?action=update",
        destroy: "http://192.168.168.10:8888/SenchaNote/Note.php?action=delete"
      },
      extraParams: {
        keyword: ""
      },
      reader: {
        type: "json",
        rootProperty: "notes",
        totalProperty: "total"
      }
    },
    pageSize: 1,
    autoLoad: true
  }
});
New things added to the were extraParams, which defined what query string we want to add to the URL in the api. Why don’t we add it to the api, you might ask, by using extraParams, if somewhere in the apps we set another parameter with the same name, which is conflict, it will get override, it will have duplicate parameters if we defined in api. This is a good thing because it will help us with the search bar, by default, we just pass in the parameter keyword with empty value, if we search something, we override it with some value.
For demonstration purposes, I’ve set the pageSize to 1, so that it only show 1 item at a time, saving me hassle to create many dummy records to test paging.
It’s very obvious that we going to add paging to the list view, so:
app/view/NoteList.js
Ext.define("SenchaNote.view.NoteList", {
  extend: "Ext.dataview.List",
  xtype: "notelist",
  requires: ["Ext.plugin.ListPaging"],
  config: {
    store: "Note",
    plugins: [
      {
        xclass: "Ext.plugin.ListPaging",
        autoPaging: false
      }
    ],
    itemTpl: [
      '<div>',
        '<div>{content}</div>',
        '<div>{category}</div>',
      '</div>',
    ],
    onItemDisclosure: function (record, btn, index) {
      this.fireEvent("editNoteCommand", record);
    }
 },
});
First, import the Ext.plugin.ListPaging, then add a plugin with the xclass, here I set the autoPaging to false, so that user need to tap on the “Load More…” to load next page (this text can be change, refer to the documentation), if autoPaging is set to true, then user just need to scroll till bottom, it will auto load more.
Even though our Note.php was already coded with paging enable query, we still need to change something, to reuse the function of listing records, use it for search, by adding keyword search.
Note.php – inside first IF
$result = array("notes" => array(), "total" => 0);
$current_page = $_REQUEST["page"];
$limit_per_page = $_REQUEST["limit"];
$offset_page = $_REQUEST["start"];

$keyword = "";

if (isset($_REQUEST["keyword"])) {
  $keyword = $_REQUEST["keyword"];
}

$query = "select n.id,content,categoryid,name from notes n left join categories c on n.categoryid = c.id where content like concat('%','" .$keyword. "', '%') limit " .$limit_per_page. " offset " .$offset_page;
$dbresult = mysql_query($query);

if (mysql_affected_rows() > 0) {
  while ($row = mysql_fetch_array($dbresult)) {
    array_push($result["notes"], array("id" => $row["id"],
      "content" => addslashes((string)$row["content"]),
      "categoryid" => $row["categoryid"],
      "category" => (string)$row["name"])
    );
  }
}

$query = "select * from notes where content like concat('%','" .$keyword. "','%')";
$dbresult = mysql_query($query);
$result["total"] = mysql_affected_rows();

mysql_close();
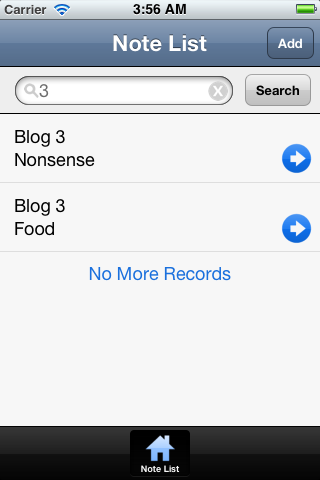
I’ve added the $keyword, to read from query string, then use the like in SQL, also use the like at the second query to get the total page of search result.
Ah, while we’re in the code editor, just do some last changes, on the search function.
app/controller/Note.js – onSearchNote: function()
var store = Ext.getStore("Note");

store.getProxy().setExtraParam("keyword", this.getSearchField().getValue());
store.loadPage(1);
Note that on part 2, I remove the code and replaced with this one, it’s because that code simple send the keyword get from the search field and pass it using the read url in api inside the Note store, but it does not work with paging, as it just send the keyword once on button tap, subsequence paging did not add the keyword param, hence I’ve added the extraParams, to make sure that the keyword param is always there.
Now, the 3 liners means we need to get the note store, and override the extra param keyword, get the value from textbox (remember the magical refs and controls in the controller). The last one loadPage(1) is simply use to reset the paging count back to 1st page, if didn’t add in this line, when the user load more from the listing page (without search), for example, user reaches the page 5, and then user go to search for something, without that line, the paging will continue will page 6, and it won’t get us correct result, we need the search result page start from page 1.
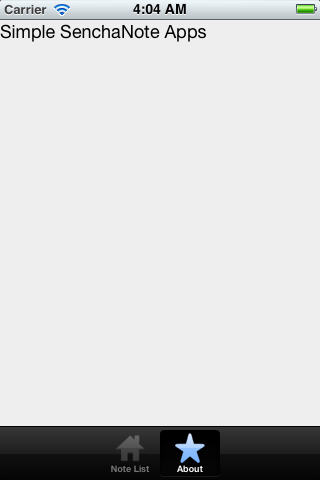
See the little icon “Note List”, let’s add another one there, the usual “About” screen. I’m not going to do anything there, no toolbar (no title there either), just plain screen with some unformatted text, just to show how to add another tab item, things done on the “Note List” screen can be done on the new screen.
app/view/AboutPanel.js
Ext.define("SenchaNote.view.AboutPanel", {
  extend: "Ext.Panel",
  xtype: "aboutpanel",
  config: {
    title: "About",
    iconCls: "favorites",
    items: [
      {
        html: "Simple SenchaNote Apps"
      }
    ]
  }
});
Most simplest view ever , nothing special, create a panel, give it title, give it icon, and single item, which is html item. Remember, add new view, need to inform the application.
app.js
views: ["Viewport", "MainPanel", "NoteListContainer", "NoteEditor", "AboutPanel"]
Edit the app.js, just add in “AboutPanel” in the views list. But this time we won’t add the new view to the Viewport, because MainPanel is the view that hosting the tab, so we want to add in there instead.
app/view/MainPanel.js
items: [
  {
    xtype: "notelistcontainer"
  },
  {
    xtype: "aboutpanel"
  }
]
Done, we’re done, screen change animation is provided by Sencha Touch, we no need to handle screen change as well.
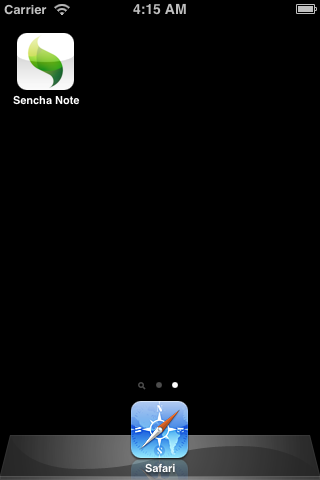
Let’s create a folder resources/images, and put in 2 icon, app-iphone-icon.png, and app-icon.png. And when the page is added to the iOS home screen:
And there is even an option to turn off the glossy on the icon (Check documentation Ext.app.Application).
To deploy, copy sencha-touch-all.js from Sencha Touch SDK folder to our resources folder, copy apple.css and sencha-touch.css from SDK’s resources/css folder to our resources/css folder. And change our index.html:
index.html
<!DOCTYPE html>
<html>
<head>
  <title>Sencha Note</title>
  <link rel="stylesheet" href="resources/css/sencha-touch.css" type="text/css">
  <link rel="stylesheet" href="resources/css/apple.css" type="text/css">
  <script type="text/javascript" src="resources/sencha-touch-all.js"></script>
  <script type="text/javascript" src="app.js"></script>
</head>
<body>
</body>
</html>
We’re all set, but, remember all the arrow on the list, the home and star icon on our bottom tab? All those images were embed in the CSS file itself using data URL, neat!
I’m still very new to Sench Touch and MVC, and I’m learning while developing this apps, so I might have mistakes here and there, but hope it helps people that need some example, as how I looking for Sencha Touch MVC example last time.
Here is the source code (without database) https://github.com/stephensaw/Sencha-Note
Related posts:
